In this tutorial, we are going to learn how to deploy a sample nginx pod to minikube cluster using yaml file and expose the pod using Kubernetes service.
In our previous tutorial regarding Minikube, we learned how to install and configure a Minikube server using the none-driver.
if you still don’t know how to install and configure a minikube cluster visit our previous article.
How to install and configure Minikube.
What is a pod?
Pods are the smallest deployable units of computing that you can create and manage in Kubernetes.
A Pod (as in a pod of whales or pea pod) is a group of one or more containers, with shared storage and network resources, and a specification for how to run the containers. A Pod’s contents are always co-located and co-scheduled, and run in a shared context. A Pod models an application-specific “logical host”: it contains one or more application containers which are relatively tightly coupled. In non-cloud contexts, applications executed on the same physical or virtual machine are analogous to cloud applications executed on the same logical host.
In simple terms inside the pod, the application containers run in Kubernetes.
We can create a pod in 2 methods one directly using kubectl command and the other one using the YAML file.
apiVersion: v1
kind: Pod
metadata:
  name: myapp
  labels:
    name: myapp-nginx
    type: webserver
spec:
  containers:
  - name: myapp-nginx
    image: nginx
    resources:
      limits:
        memory: "128Mi"
        cpu: "500m"
    ports:
      - containerPort: 80
There are some structures we need to follow while creating a pod manifest file.
You can go through the official Kubernetes documentation for further details.
https://kubernetes.io/docs/concepts/workloads/pods/
apiVersion: v1: This indicates that the Kubernetes API version being used is “v1.” It specifies the version of the Kubernetes API that the YAML file is compatible with.kind: Pod: This specifies the Kubernetes resource type, which is a “Pod.” A Pod is the smallest deployable unit in Kubernetes and represents a single instance of a running process in the cluster.metadata: This section provides metadata for the Pod, including its name and labels.name: myapp: This sets the name of the Pod to “myapp.” The name is used to uniquely identify the Pod within the Kubernetes cluster.labels: Labels are key-value pairs used to organize and categorize resources in Kubernetes. In this case, the Pod is labelled with “name: myapp.”spec: This section defines the specification or configuration of the Pod.containers: This is an array that defines one or more containers to be run inside the Pod.name: myapp-nginx: This sets the name of the container to “myapp-nginx.“image: nginx: This specifies the Docker image that will be used to create the container. In this case, it uses the official Nginx image from Docker Hub.resources: This section allows you to set resource constraints (CPU and memory) for the container.limits: It specifies the maximum amount of resources the container can consume.memory: "128Mi": This sets the memory limit to 128 megabytes.cpu: "500m": This sets the CPU limit to 500 millicores, which is equal to 0.5 CPU core.
ports: This section defines the ports that the container will listen on.containerPort: 80: This sets the container port to 80. It means that the container will listen on port 80, and this port will be exposed outside the Pod to allow incoming traffic.
In summary, the pod.yml file defines a single Pod with one container named “myapp-nginx,” running the Nginx web server with resource constraints of 128Mi memory and 500m CPU. The Nginx container will listen on port 80, allowing incoming traffic to access the Nginx web server running inside the Pod.
Create this file using an editor and apply it using
kubectl apply -f <filename.yaml>
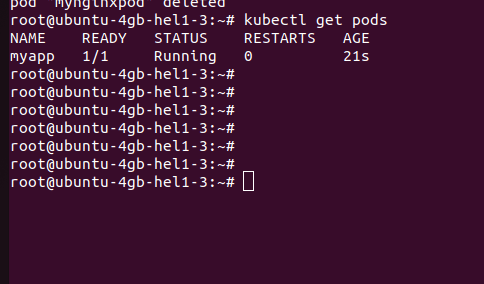
If the pod is deployed correctly you will see a output similar to this image as shown above.
Now what if I want to access the application? How to expose the Nginx pod publicly?
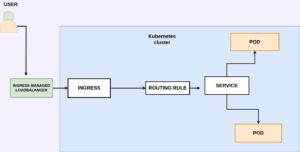
Kubernetes services
Kuberenetes services helped us to expose a pod externally to the public .
There are 3 types of services mainly nodeport, clusterip and loadbalancer.
ClusterIPExposes the Service on a cluster-internal IP. Choosing this value makes the Service only reachable from within the cluster. This is the default that is used if you don’t explicitly specify a type for a Service. You can expose the Service to the public internet using an Ingress or a Gateway.NodePortExposes the Service on each Node’s IP at a static port (the NodePort). To make the node port available, Kubernetes sets up a cluster IP address, the same as if you had requested a Service of type: ClusterIP.(30000 – 32767)LoadBalancerExposes the Service externally using an external load balancer. Kubernetes does not directly offer a load-balancing component; you must provide one, or you can integrate your Kubernetes cluster with a cloud provider.ExternalNameMaps the Service to the contents of the externalName field (for example, to the hostname api.foo.bar.example). The mapping configures your cluster’s DNS server to return a CNAME record with that external hostname value. No proxying of any kind is set up.
There are 3 types of ports while coming to service in Kubernetes.
port: Theportfield defines the port number on which the Service will listen for incoming traffic. It is the port number that external clients or other Services will use to access the Service. When traffic is directed to this port on the Service’s IP address, Kubernetes will forward that traffic to thetargetPorton selected Pods.targetPort: ThetargetPortfield specifies the port number on the Pods that the Service should send the incoming traffic to. It represents the port on which the application inside the Pod is listening. ThetargetPortis used to determine which port on the Pod should receive the traffic forwarded by the Service.if you only specify theportin your Kubernetes Service YAML file without explicitly specifying thetargetPort, Kubernetes will use the same port number as thetargetPort. In such cases, the incoming traffic received on theportof the Service will be forwarded to the Pods on the same port.- Nodeport: The port on which the node exposes the services. If we didn’t specify a node port in our service file Kubernetes automatically assigns a node port in the range of (30000 – 32767).
I used this service file to create the service.
Under the spec section, we define the selector to match the service these labels must be similar to our pod labels so that the service can map that pod.
Also, we are exposing port 80 of our container to serve traffic
apiVersion: v1
kind: Service
metadata:
  name : my-nginx-service

spec:
 selector:
    name: myapp-nginx
    type: webserver
 ports:
    - protocol: TCP
      port: 80
After creating the service file apply it using kubectl apply -f <svc.yaml>
If the service is created successfully you will get a similar response after running this command.
kubectl get service

Now the service type is clusterip .
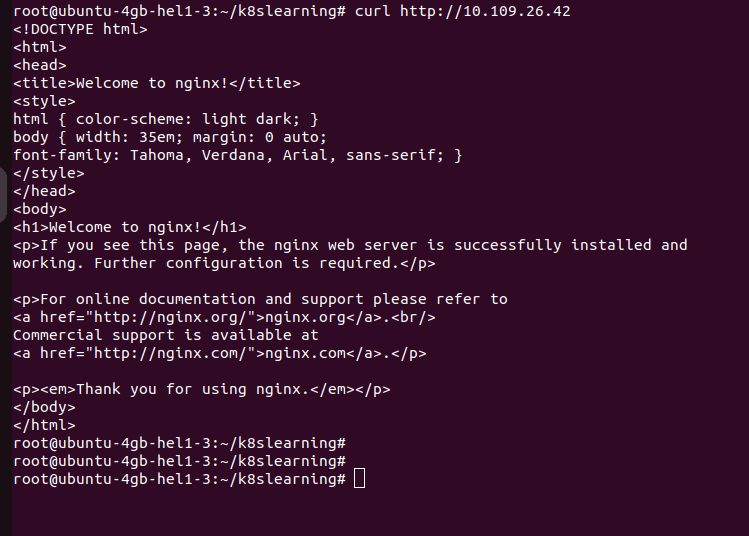
So let me check if I am able to curl my nginx-app locally using the cluster IP address 10.109.26.42 locally.
curl http://10.109.26.42 is working locally as expected and returning my Nginx default page.
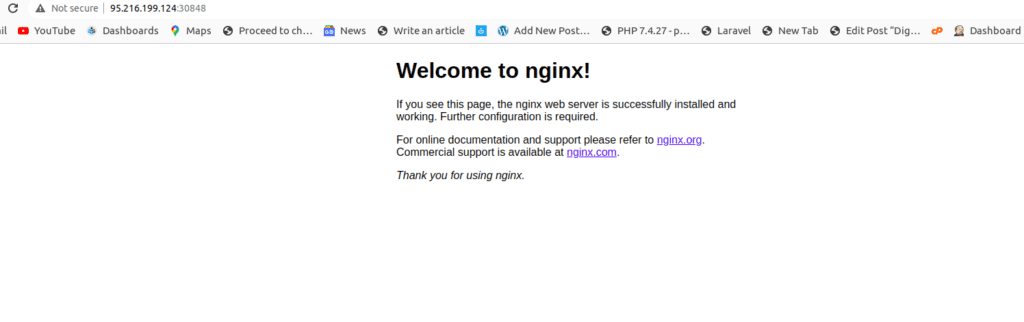
But how can I access this pod from the external browser? For that, I need to create the service type as NodePort.
apiVersion: v1
kind: Service
metadata:
  name : my-nginx-service

spec:
 type: NodePort
 selector:
    name: myapp-nginx
    type: webserver
 ports:
    - protocol: TCP
      port: 80
In this modified service file I have added the type Nodeport which means that the service will be created as a node port service.

As you can see the service has changed to Nodeport from ClusterIp and also it has been assigned by a node port 30848 by the Kubernetes.
Make sure that this port is opened by your firewall if so you can call the nodeip address and port.
But these ports will change over time also we can define the node port direclty in our service file itself.
apiVersion: v1
kind: Service
metadata:
  name: my-nodeport-service
spec:
  type: NodePort
  selector:
    app: my-app
  ports:
    - name: http
      port: 8080
      nodePort: 30848
That’s all about deploying an Nginx pod and exposing the container using Kubernetes nodeport service.
Summary:
In this article, we have learned how to deploy a pod to the Minikube cluster and expose it publically.