As we all know, Google Cloud is one of the top three public cloud platforms in the market, offering over 200 services. Within these services, Compute Engine stands out as a vital component, allowing users to create and manage virtual machines. We can draw parallels between this service and AWS EC2.
Before diving into Compute Engine, it’s essential to have a basic understanding of GCP. With 20+ regions worldwide, each comprising three or more zones, GCP ensures high availability and reliability. Zones within a region are interconnected, enhancing fault tolerance and resilience.
Services like VM instances are region-specific, meaning instances are deployed in a particular region within the cloud.
In GCP, all services are deployed under a project, and users can have multiple projects, each with specific access configurations.
The key features of compute engine are
1: Create and manage virtual machines in GCP.
2: Load balancing and autoscaling for multiple Virtual machines.
3: Attach storage and network storage to Virtual machine instances.
4: Manage network connectivity and configurations for your VM instances.
Prerequisites:
1:You must have a Google Cloud account access to a project.
Logging into GCP console
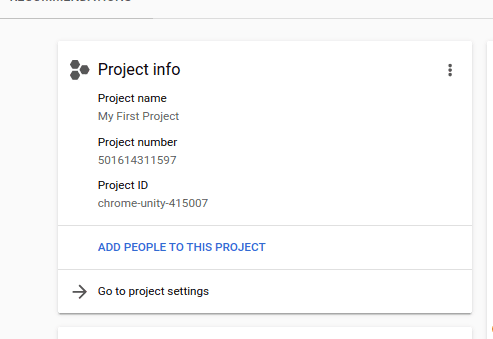
Initially, when you log in to our GCP account you will be able to see some details regarding our project.
All our resources are going to be deployed under this project.
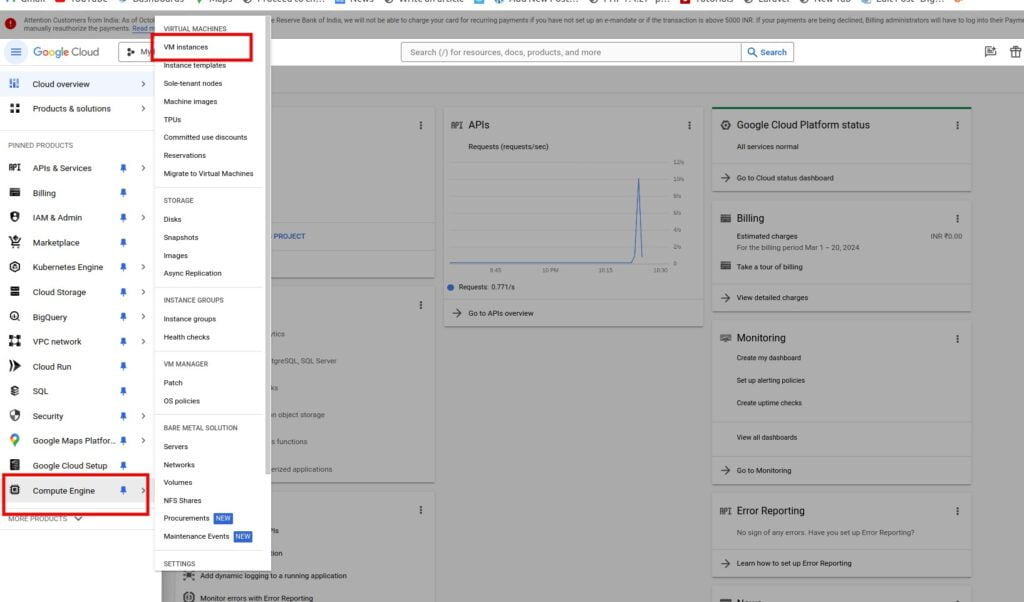
Now go to compute engine> VM instance from the left side of your window.
Now you will be logged in to the compute engine dashboard as shown in the below image.
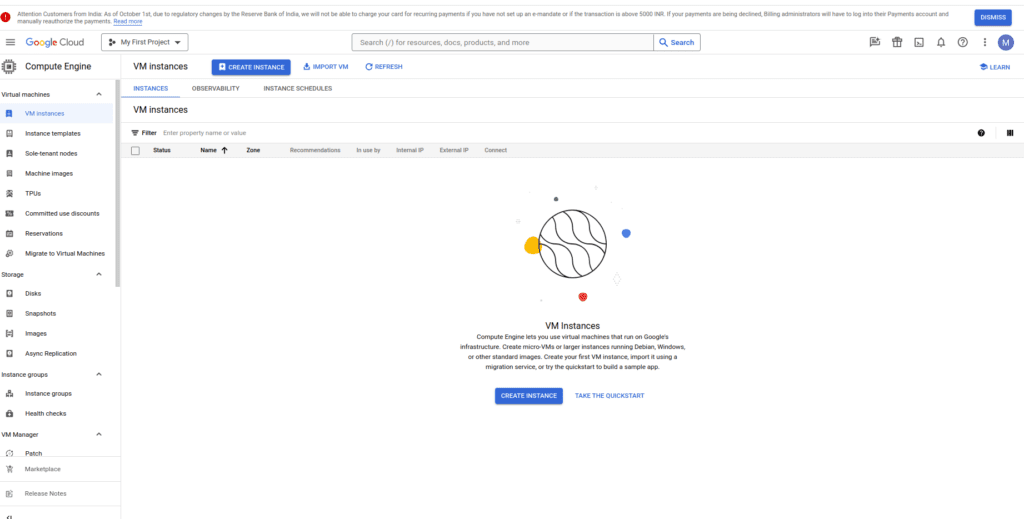
The next step is to create our first virtual machine in GCP with all the default configurations.
Click on the Create Instance option
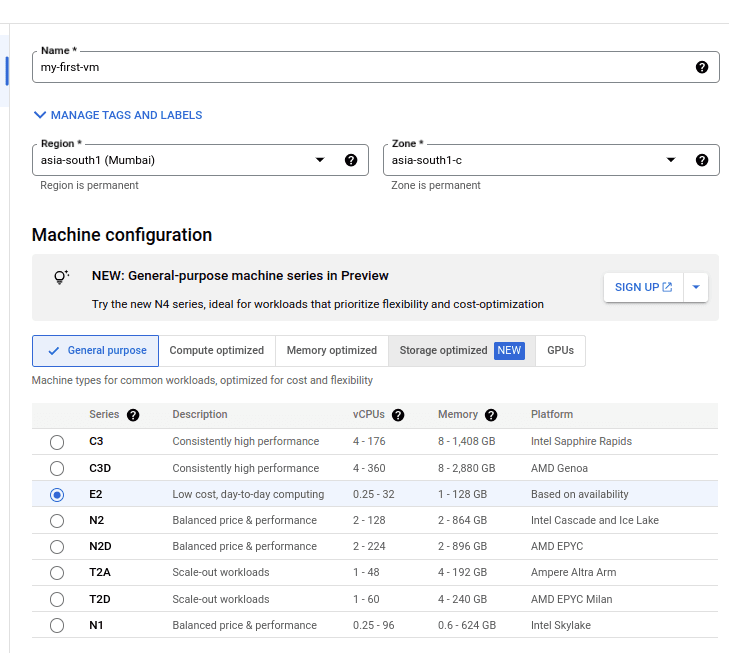
Choosing the region and the machine configuration
Provide a name to your instance and also select the required region here I am using the Mumbai region for the Machine configuration choose the appropriate machine configuration for your virtual machine.
There are 5 types of machine configurations in GCP
1: General purpose.
2: Compute-optimized.
3: Memory optimized.
4: Storage optimized.
5: Accelerator-optimized.
For this demo purpose, I am using General-purpose machine type E2
You can check other series in the below link general-purpose-machines.
So far we have selected the region and the machine configuration.
Select the machine type and boot disk.
For machine type, I am selecting standard-core e2-small which has 0.5-2 vcpu and 2GB of memory.
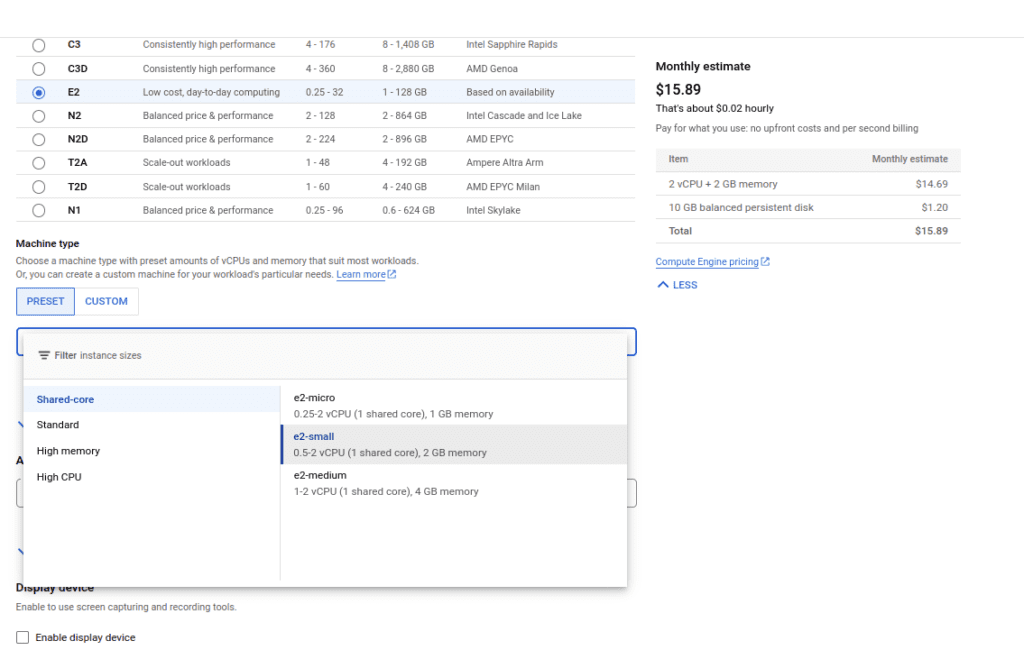
We can also define a custom virtual machine type.
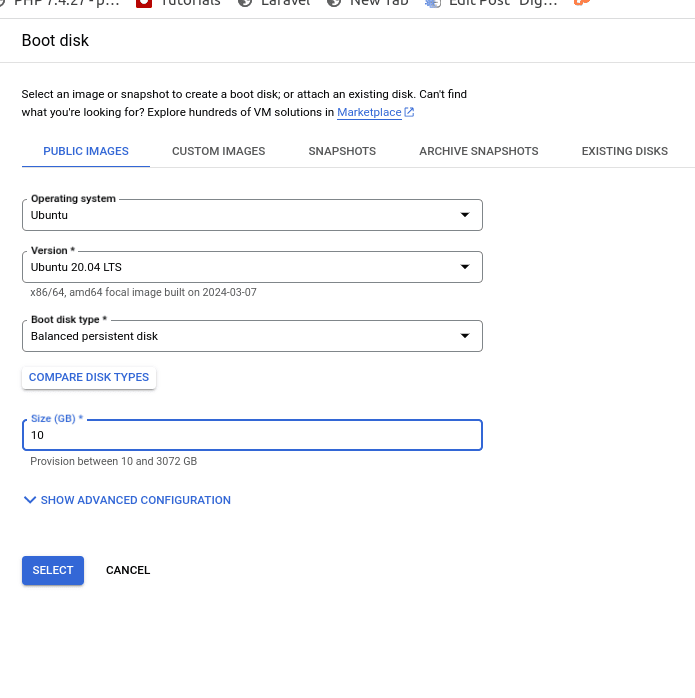
In the boot disk, we are selecting Ubuntu 20.04 LTS with 10 GB of storage as shown below
In the advanced setting options create a ssh-keygen and add the public key as shown below.
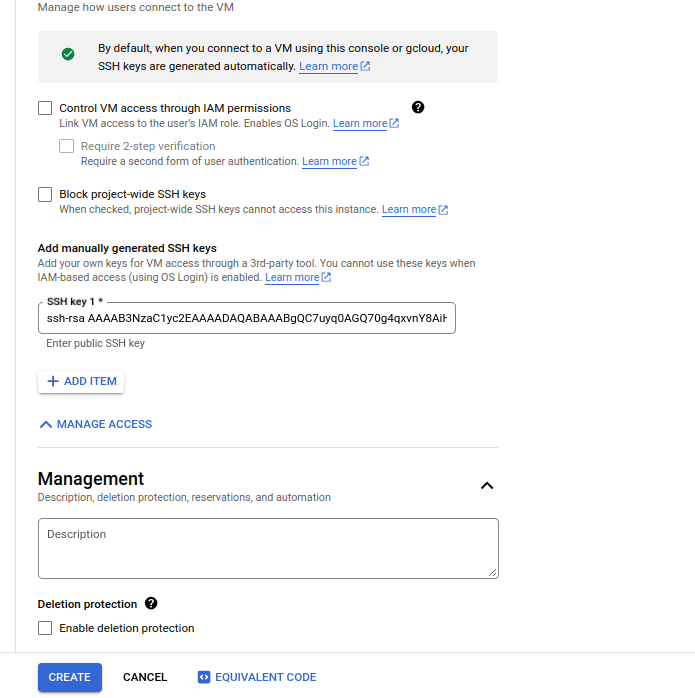
Leave other options as default click on Create an instance and wait until the instance becomes available by default SSH traffic will be allowed from everywhere so you can SSH from your local machine using the generated key.
When you create a new SSH key pair and use it to connect to a Google Compute Engine (GCE) instance, GCP automatically creates a new SSH user with the username set to the name of the SSH key. This is a security measure implemented by GCP to enhance the security of GCE instances.
When you try to SSH into a GCE instance using your SSH key, you need to use the username that matches your SSH key’s name. For example, if you generated an SSH key pair with the username “myuser“, you would use that username to SSH into the GCE instance, like so
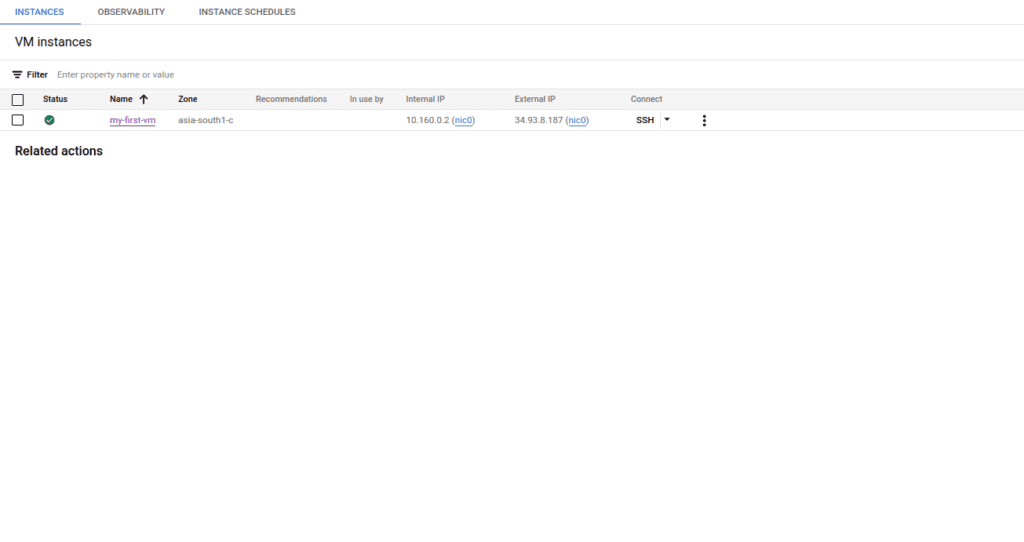
After creating the instance you will get a similar kind of window that shows the instance name the private IP and also the public IP etc.
You can also ssh into the machine using the ssh option within the console.
Summary:
That’s it we have created our first VM in GCP using all the basic configurations.
In the next article, I will show how to create a virtual machine using an instance template and deploy a webserver using a startup script.