
We have discussed how to install Nginx and set up a virtual host in our previous blog How to install and configure Nginx in Ubuntu 20.04. By default, Nginx will only process HTML Pages and if your try to open a PHP page Nginx will download it. So in this blog, I will show you how to install PHP-FPM 8.1 on Ubuntu and configure it with Nginx to serve PHP pages also.
PHP-FPM works along with Nginx in order to provide better performance and speed by creating separate pools for each web application. PHP-FPM runs as an isolated service which means Nginx handles only the HTTP request and all the PHP codes are interpreted by PHP-FPM via TCP/IP socket. therefore when a user requests a PHP page the Nginx server will pass the request to the PHP-FPM service using FastCGI.
Configuring Nginx to work with PHP-FPM
Step 1: Install PHP-fpm 8.1.
PHP can be installed using Ondřej Surý PPA, so install the software-properties-common package, add the Ondrej PPA and update your sources using the following commands:
sudo apt-get install software-properties-common
sudo add-apt-repository -y ppa:ondrej/php
sudo apt update
sudo apt install php8.1-fpm
Step 2: Confirm the status of the PHP-fpm service using systemctl command.
systemctl status php8.1-fpm.service.
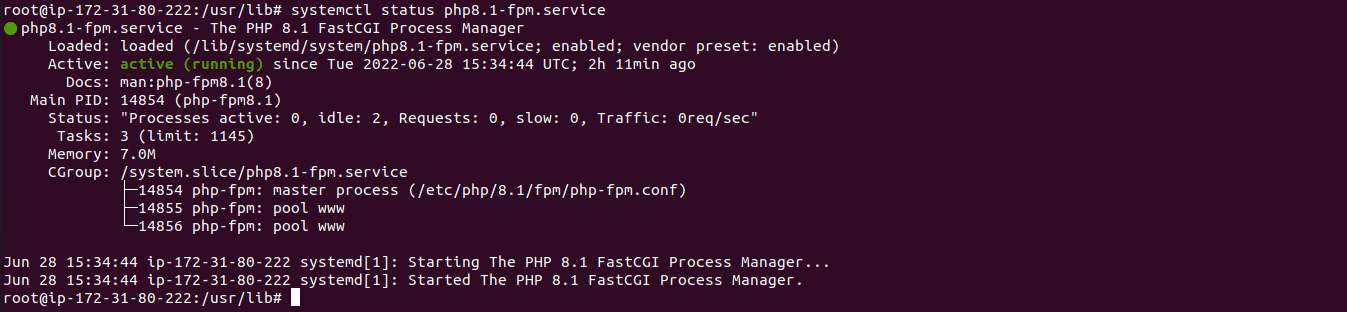
After installation php-fpm creates a default pool ie www.conf inside the /etc/php/8.1/fpm/pool.d folder which is similar to the default conf in Nginx.
Either we can edit this default pool in order to serve PHP files but it is standard practice to create a separate pool for our web application for better resource allocation and configurations. for this demo, I am using the default pool ie /etc/php/8.1/fpm/pool.d/www.conf.
Step 3: Create an Nginx Virtual Host File for Your Website.
Create a conf file name domain.com.conf in /etc/nginx/conf.d/ directory and copy-paste the below server block in it.
cd /etc/nginx/conf.d/
vi domain.com.conf
server {
listen 80;
listen [::]:80;

 server_name domain.com;

root /var/www/domain;
index index.php index.html;

location / {
        try_files $uri $uri/ =404;
}

    # pass PHP scripts to FastCGI server
    #
    location ~ \.php$ {
            include snippets/fastcgi-php.conf;
    #
    #       # With php-fpm (or other unix sockets):
            fastcgi_pass unix:/var/run/php/php8.1-fpm.sock;
    #       # With php-cgi (or other tcp sockets):
    #       fastcgi_pass 127.0.0.1:9000;
    }

    # deny access to .htaccess files, if Apache's document root
    # concurs with nginx's one
    #
    location ~ /\.ht {
            deny all;
    }
}
next, create a directory inside /var/www named domain and put an index.html page to test the working.
mkdir -p /var/www/domain
chown -R $USER:$USER /var/www/domain
vi index.php
Copy and paste the PHP info code in the index.php file
<?php
phpinfo();
?>
Reload the Nginx using the command.
nginx -s reload
OR
systemctl reload nginx
Step 4: Test the working using host entry
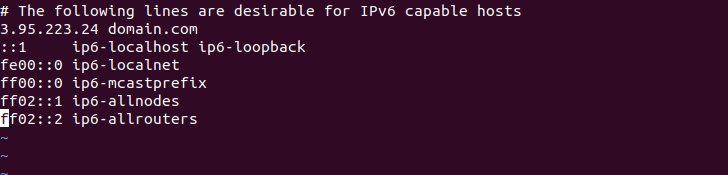
Test whether the page is working or not? As our domain is not publicly available I am putting the domain as host entry on my local computer to see its working. Enter this command on your local terminal.
sudo vi /etc/hosts
Put the IP address of the server and domain name as shown in the above image in your host file.
navigate into a web browser and type domain.com to see if it’s working.
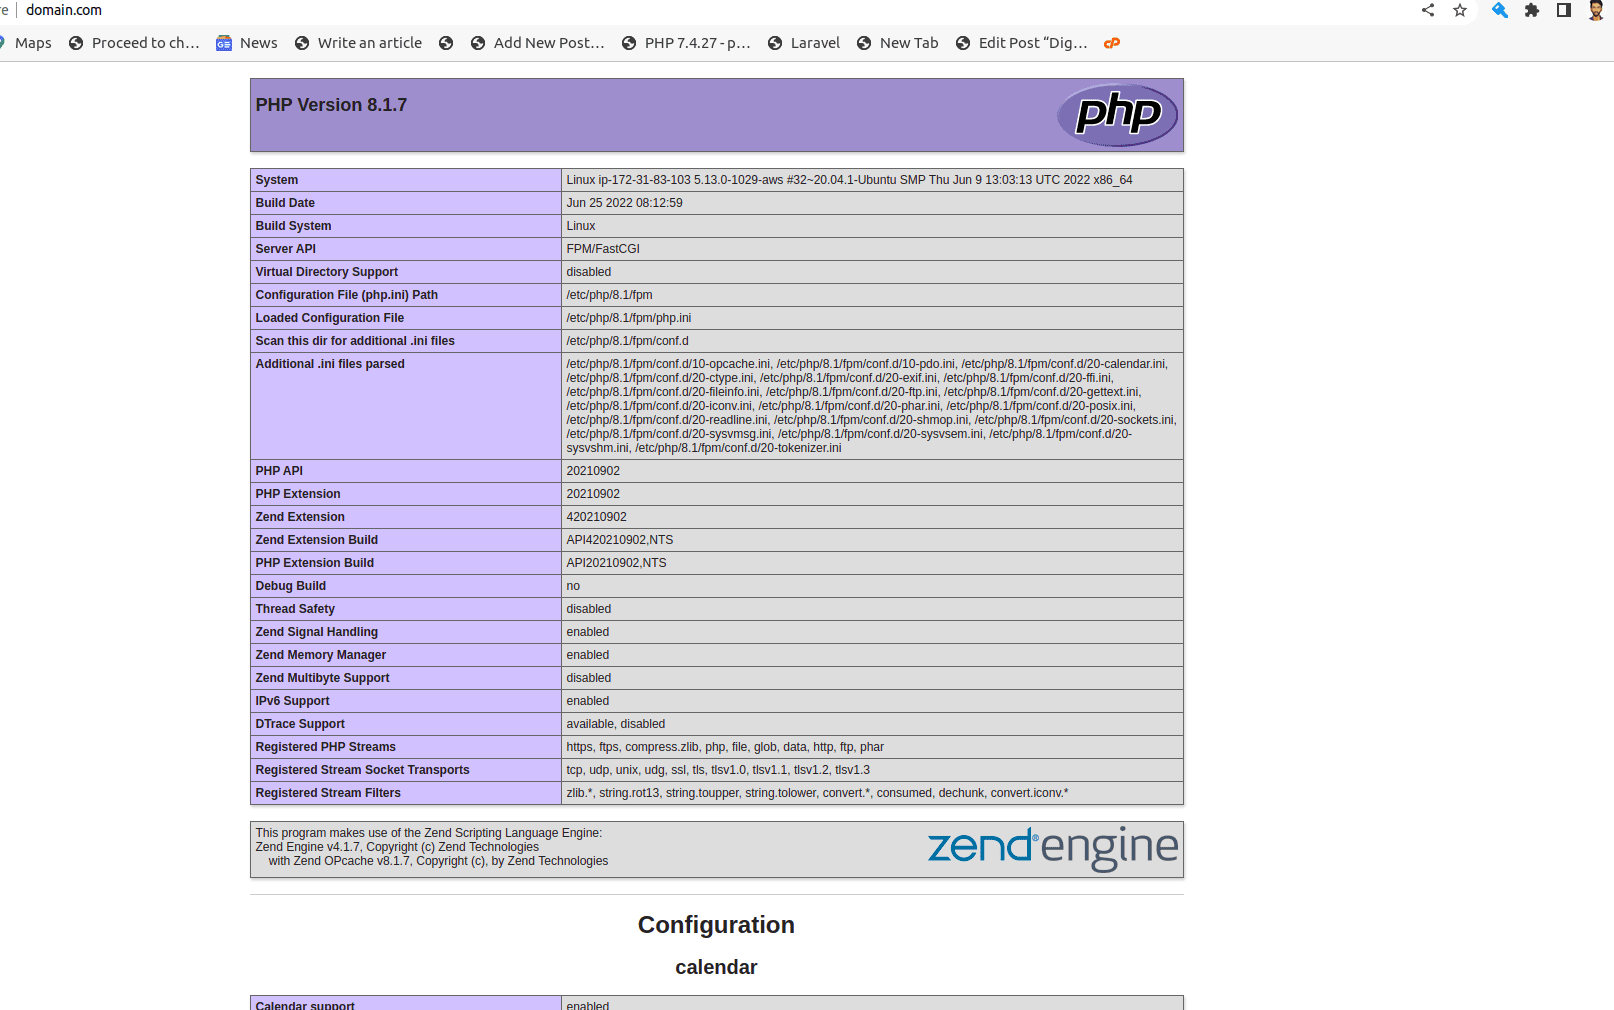
Now we have configured PHP-FPM to listen to the default pool ie www-data in order to serve this website’s PHP files.
Step 5: Configuring PHP-fpm for better performance
If we have large resource-consuming multiple websites it is a standard practice to create separate pools to have better control over resource allocation to each FPM process.
Creating a separate pool for this virtual host.
First we need to create new user under which we are going to create the pool.
groupadd domain-user
useradd -g domain-user domain-user
next create a custom pool under the /etc/php/8.1/fpm/pool.d directory.
cd /etc/php/8.1/fpm/pool.d
vi domain-user.conf
[domain-user]
user = domain-user
group = domain-user
listen = /var/run/php/php8.1-fpm-domain-user.sock
listen.owner = www-data
listen.group = www-data
php_admin_value[disable_functions] = exec,passthru,shell_exec,system
php_admin_flag[allow_url_fopen] = off
; Choose how the process manager will control the number of child processes.
pm = dynamic
pm.max_children = 75
pm.start_servers = 10
pm.min_spare_servers = 5
pm.max_spare_servers = 20
pm.process_idle_timeout = 10s
copy paste the custom pool configuration in the conf file.
The main part of the configurations file is
domain-user: is the name of the pool and must be unique.
user and group:The user and group which pool will run.
Listen:The name of the socket file of this pool.
listen.owner and listen.group: Must match to the user and group on which NGINX is running. In our case it is www-data.
Other parts are the custom values to control php related process which can configure accordingly as you wish. you can read more about if from the official php-fpm documentation
https://www.php.net/manual/en/install.fpm.configuration.php.
Step 6: Modifying the Nginx virtual host accordingly.
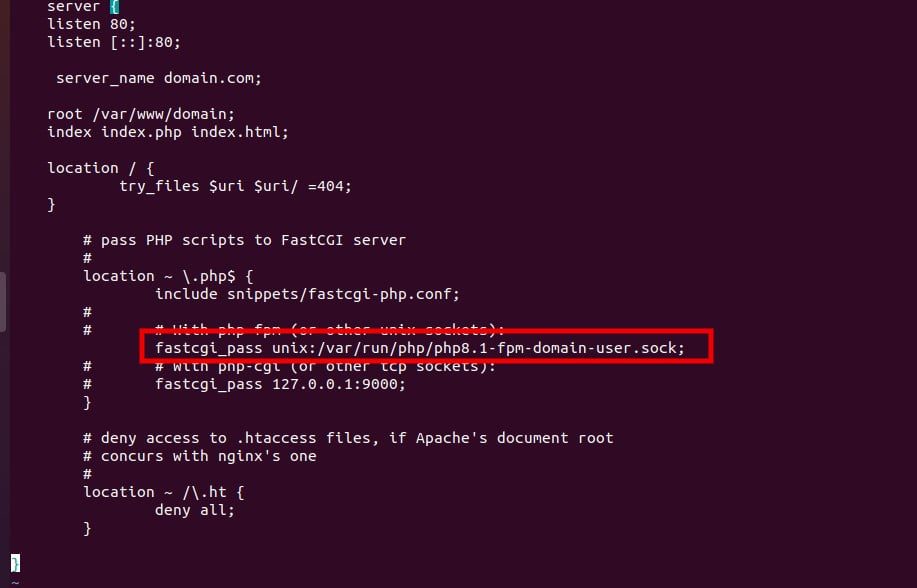
Modify the fastcgi_pass Unix socket to the name of the socket we have created earlier.
Test Nginx Configuration Syntax and restart service for Changes to Take Effect.
systemctl restart php8.1-fpm.service
nginx -s reload
OR
systemctl reload nginx
navigate in to your web browser and call the domain.com again to see that change ie

You will notice that the value of $_SERVER[‘USER’] and $_SERVER[‘HOME’] variable are pointing to domain_user and /home/domain_user respectively which we set in the FPM configuration file previously and thus confirms that the NGINX is serving the PHP pages using our desired FPM pool.
Summary: In this blog, we have learned how to configure Nginx to work with PHP-fpm to serve PHP files using the default pool and also create a custom pool for the website in order to handle resources more effectively.


