In our previous blog, we learned the basics of ansible Learn ansible from scratch.
In this blog, we are going to learn how to install and configure ansible on ubuntu for that we are managing 2 nodes/servers using the ansible control node.

Right now I have provisioned 3 ec2 instances AWS.Ec2 instance is nothing but a virtual server in AWS. You can follow the below article to see how to provision ec2 instances from AWS.
`https://docs.aws.amazon.com/efs/latest/ug/gs-step-one-create-ec2-resources.html`
As you can see below in the screenshot I have provisioned 3 servers from AWS.

Step 1: Install Ansible on the control node
SSH into the control node and install Ansible on it using the command
Before installing Ansible we need to update the repo using the apt command.
apt update
Install the software-properties-common package on Ubuntu to enable PPA support, and run
sudo apt -y install software-properties-common
sudo apt-add-repository ppa:ansible/ansible
apt install ansible
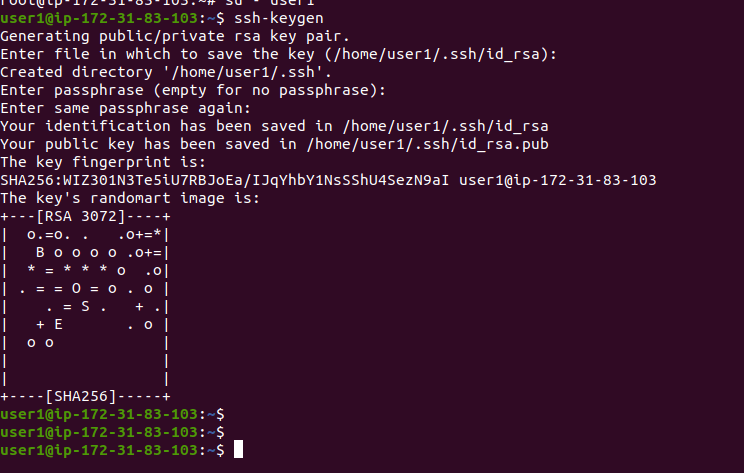
Step 2: Creating ssh key-gen on the control node
The next step is to create an ssh-keygen in the control node for this we are creating a user and a directory named user1 on the control node
useradd -m -d /home/user1 -s /bin/bash user1
Now, assign administrative access to the account. The following command assigns superuser privileges, allowing the account to use the Sudo command.
usermod -aG sudo user1
Now switch to that user using su – user1 command and create an ssh-keygen for that user
ssh-keygen
Initially, if we create an AWS ec2 instance the password login and root login will be restricted in the sshd conf for security purposes we can modify the conf and allow password authentication to our instances. You can follow this article in order to allow password authentication to our ec2 instances.
https://www.linuxlearninghub.com/enable-password-authentication-for-aws-ec2-instance/
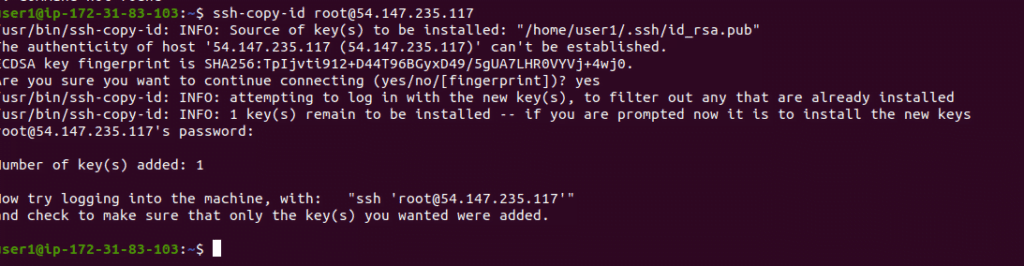
Step 3: Enabling connection to managed nodes
Next, we are going to configure our ansible host initially we need to set up the connection to our host from our control node. For that, the easiest method of setting up an SSH public key is to copy it using the ssh-copy-id command: The username and IP address are of the managed node1.
ssh-copy-id root@<node1ip>
Now our control node and one host are connected you can check the working by trying to ssh into the host from the control node it will not ask for any password.
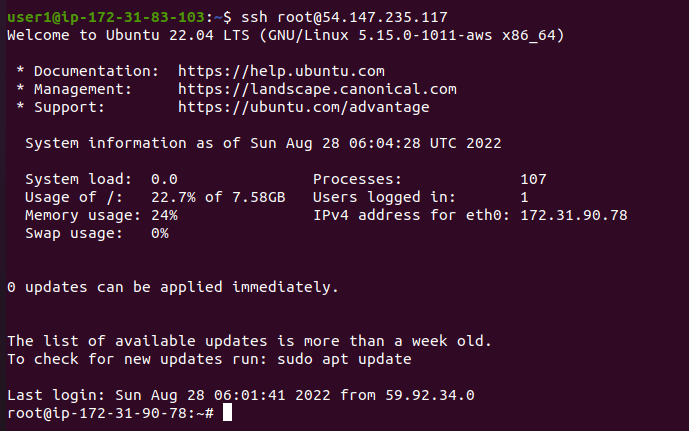
As you can see in the above image I directly logged into the host without entering the password. Similarly, do the same process for another host (managed node2) as well.
As we have connected to both ansible hosts using the ssh-key now we need to install ansible on the control node.
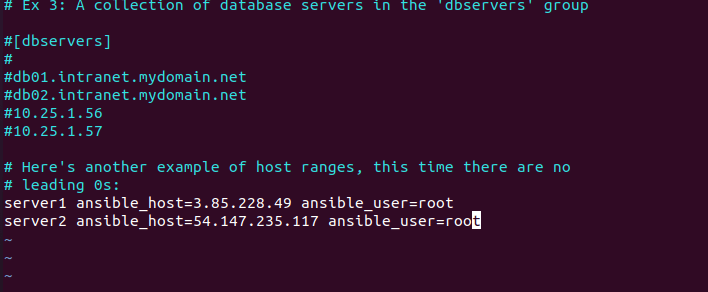
Step 4: Setting up the Inventory File
Now we need to Set up an inventory file for our remote hosts to enable Ansible to communicate with them.
Open the ansible inventory file in the control node
sudo vi /etc/ansible/hosts
With the inventory file open, you can now start adding remote hosts that your control node will manage. The default Ansible inventory file starts by listing general advice and examples on building a list of remote hosts:
create a new category using the below format
server1 ansible_host=<ipaddress> ansible_user=<username>
Step 6 : Test the connection to host is working using the ping command
ansible all -m ping
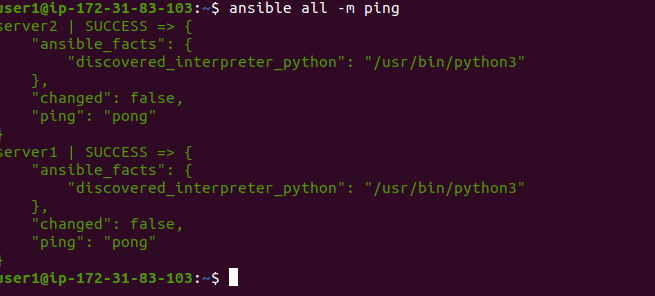
You can see the success message which indicates that the connection to both of our ansible hosts from our control node is successful now we can run the ansible command and playbooks from our control node to make changes to our managed node.
Summary:
In this blog, we covered the installation and configuration of Ansible on ubuntu 20.04