
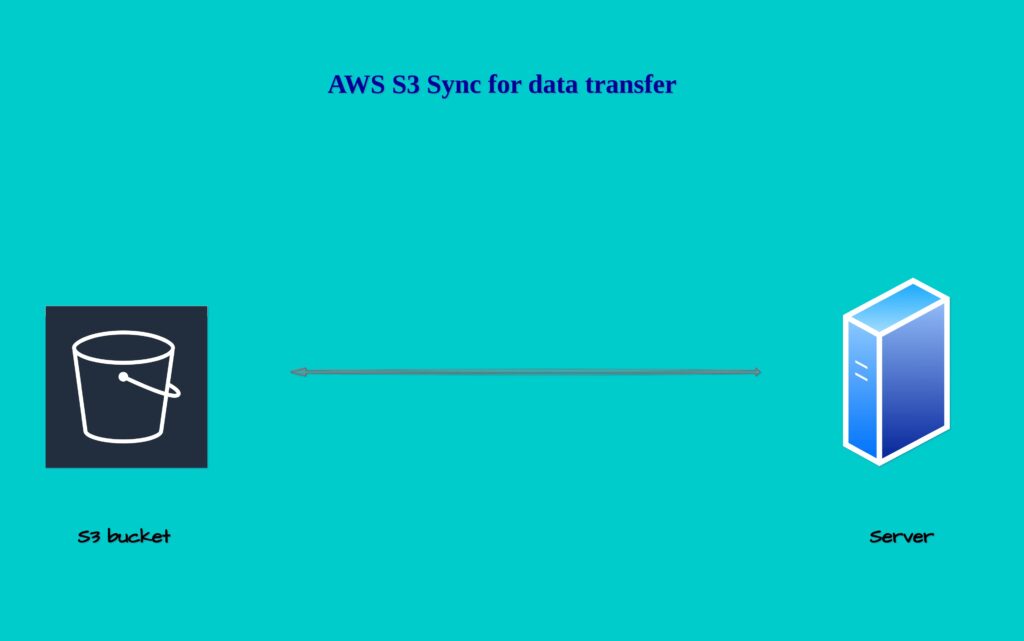
Discover the power of AWS S3 sync command, a command-line utility that seamlessly synchronizes folders and files between your local system and AWS S3 bucket using AWS CLI.
This comprehensive guide explores the benefits of using AWS S3 as a reliable storage service for backups, along with step-by-step instructions to set up AWS CLI, create an S3 bucket, and efficiently sync data between your local system and S3. Whether it’s website files or database backups, AWS S3 sync provides an effective solution for data recovery and management
We are all familiar with the Rsync command line utility, which syncs folders and files between Linux servers.
If you are not familiar with rsync read our blog How to use the Rsync command in Linux.
What is AWS s3?
- Aws s3 is called a simple storage service it’s a well-liked storage service that’s scalable, provides high-speed solutions, and is a web-based cloud storage service
- Aws s3 has many features and it’s mainly used as a storage service where we can store large backups it works as a pay-as-you-go service.
- Aws s3 stores objects inside the s3 bucket. We can create s3 buckets and storage backup and other objects inside them.
Benefits of AWS S3 as a Storage Service:
- Scalability: AWS S3 is highly scalable, allowing you to store virtually an unlimited amount of data. Whether you need to store a few2 gigabytes or petabytes of data, S3 can accommodate your needs seamlessly without any upfront capacity planning.
- Durability and Reliability: S3 ensures high durability for stored objects by automatically replicating data across multiple geographically dispersed data centers. This redundancy protects your data from hardware failures, providing a reliable storage solution.
- Availability: AWS S3 offers high availability, ensuring that your data is accessible at any time and from anywhere. It provides a robust and globally distributed network, minimizing downtime and latency.
- Security: S3 provides multiple layers of security features, including access control lists (ACLs), bucket policies, and AWS Identity and Access Management (IAM) policies. You can easily control access to your objects and define who can upload, download, or modify them.
- Versioning: S3 supports versioning, which allows you to keep multiple versions of an object in the same bucket. This feature is particularly useful for maintaining a history of changes and recovering previous versions if needed.
Pay-as-You-Go Pricing Model:
AWS S3 follows a pay-as-you-go pricing model, where you pay only for the storage you use and the data transfer out of S3. There are no upfront costs or minimum commitments, making it a cost-effective solution for businesses of all sizes. Additionally, S3 provides multiple storage classes with different pricing options, allowing you to choose the most suitable storage class based on your data access requirements and budget.
To store an object in Amazon S3, you create a bucket and then upload the object to a bucket. When the object is in the bucket, you can open it, download it, and move it. When you no longer need an object or a bucket, you can clean up your resources.
What is AWS CLI?
Aws is a CLI tool which helps to manage services inside the AWS cloud.
We can download Aws CLI in our local system using package managers and interact with various AWS services using various AWS CLI commands.
Using Package Manager (for Debian/Ubuntu)
sudo apt update
sudo apt install awscli
Using Package Manager (for CentOS/RHEL)
sudo yum install awscli
Now we got a basic understanding of AWS s3 and AWS CLI next we are going with an example and learn how to sync a file/folder from the local system to the AWS s3 bucket using AWS CLI.
Steps involved syncing files to and from the s3 bucket.
We are going through each step one by one
1:Create an S3 bucket in the AWS account.
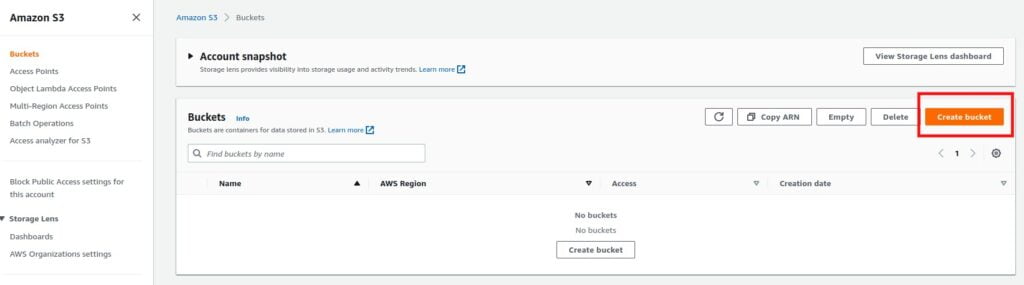
Step1: Login to your AWS account and search for s3 in the search bar
Step 2: Select buckets and click on create a Bucket on the right side of the dashboard
Under the general configurations
- Type a required bucket name in my case in choose s3testfors3sync.
- AWS Region–Selection your region.
- Object Ownership--ACLs disabled (recommended).
- Block Public Access settings for this bucket–block all public access.
- Bucket Versioning– choose as you wish.
- Tags(0) – optional.
- Default encryption-enable it you need encryption.
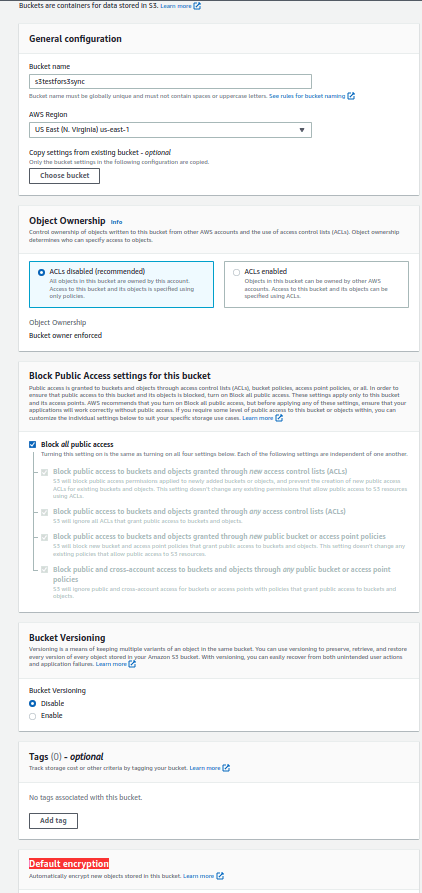
Finally, click on the create bucket option in order to create the s3 bucket.
2: Create an AWS IAM user with administrative access to the AWS account.
We need to setup s3 sync permission to our IAM account in order to sync files to s3
- Search IAM in the AWS search console.
- Select the users and click on add a user.
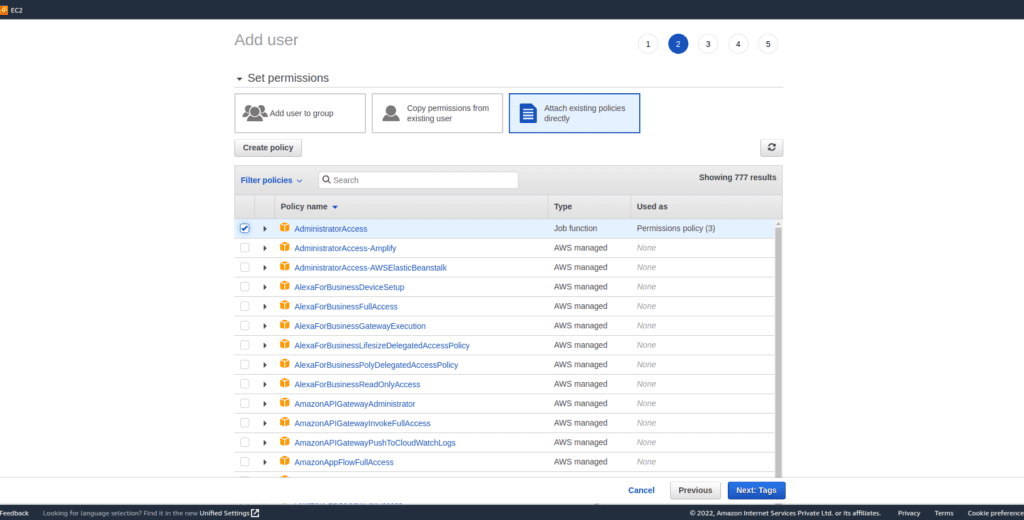
- Under user details select any user name to enable programmatically and AWS Management Console access.
- Attach permission for this account you can either create a policy or directly attach any existing AWS permission for this demo I am attaching administrative access.
It is not mandatory to attach administrative permission you need to only attach s3 full access to do this operation
- Add any tags that are optional
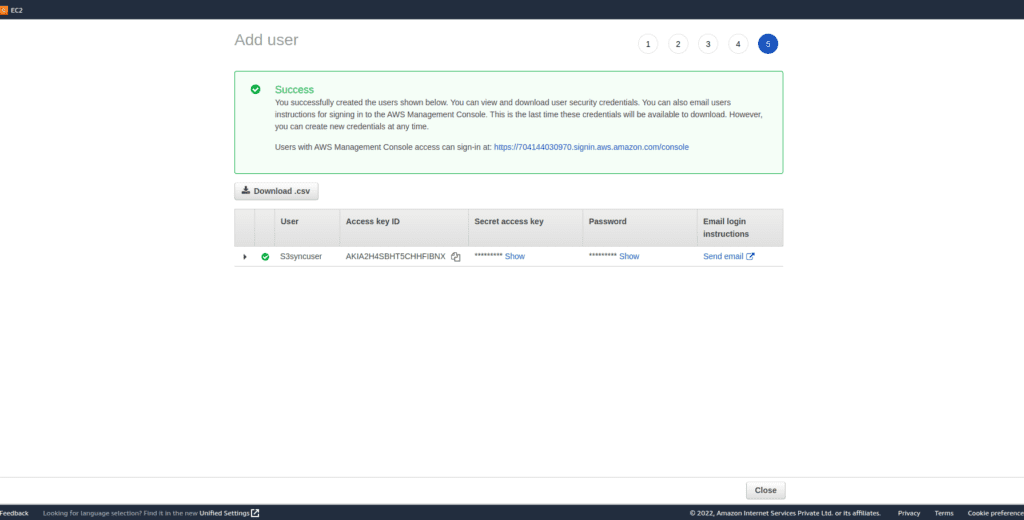
- Review and create the user download the access and secret key from the download .csv option and save it in your local system.
3: Configure the IAM profile
Configure your IAM profile in the machine using the AWS configure command
aws configure
Enter the IAM access, and secret key for the IAM account which is saved before and select the region.

In order to list your s3 bucket run this command this will list the bucket which you created earlier.
aws s3 ls
If you have done all the previous steps correctly your bucket will be listed here.
4:Sync files from local to s3 bucket
Using the AWS S3 sync command, you can effortlessly synchronize files and directories between your local system and an S3 bucket. The command detects changes in your local data and automatically updates the corresponding files in the S3 bucket, ensuring data consistency across both locations
Step 1: Create a backup.tar file which needs to push to AWS s3.
Step 2: Here I have a backup file in the folder name backup so I am syncing my backup folder with the s3 bucket.

Syntax
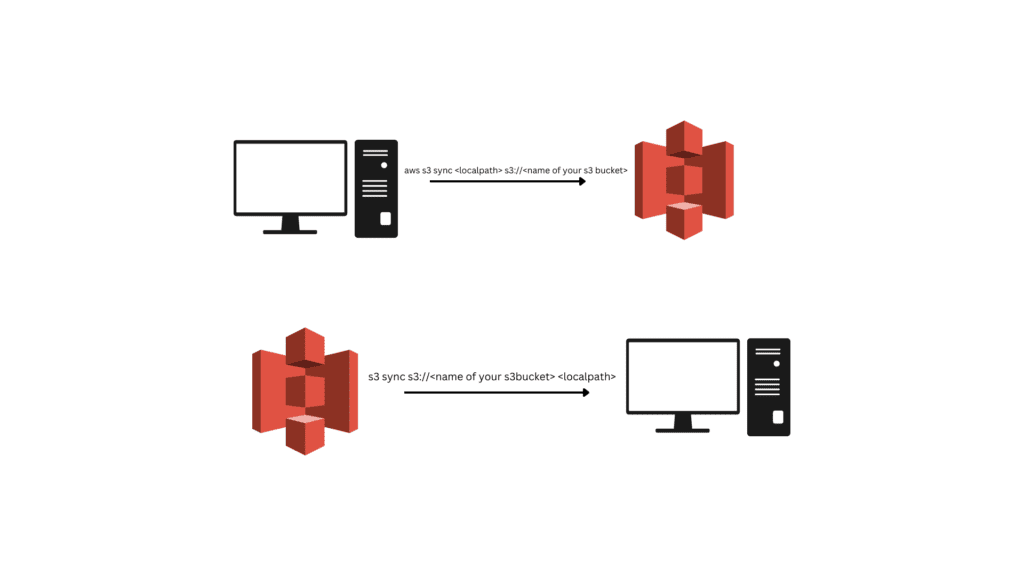
aws s3 sync <localpath> s3://<name of your s3 bucket>
aws s3 sync backup s3://s3testfors3sync

Verifying the backup.tar.gz on the AWS s3 bucket.

That is super easy also we can resync the objects from AWS s3 to our local machine.
5: Resyncing objects from s3 to the local server
In case you accidentally delete or lose data from your local system, you can effortlessly recover it from the AWS S3 bucket using the AWS S3 sync command. This provides seamless data recovery, ensuring that your critical files are always retrievable and up to date
Syntax
aws s3 sync s3://<bucketname> <localpath>
aws s3 sync s3://s3testfors3sync backup
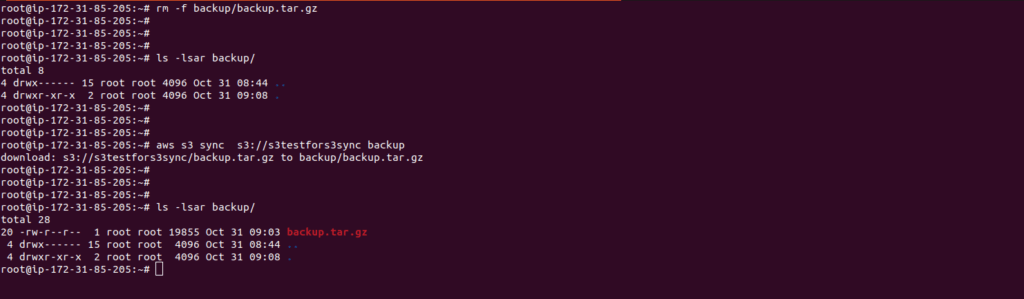
Here I have deleted the backup from the local system and resynced it using AWS s3 sync.
AWS S3 sync command simplifies the process of syncing and managing data between your local system and an S3 bucket. By following the step-by-step guide for creating an S3 bucket, you can securely store and access your data in the cloud. With its robust features and ease of use, AWS S3 sync is an essential tool for efficient data backup and recovery in AWS environments.
FAQ
What is the difference between S3 sync and S3 cp command?
s3 sync command synchronizes the local directory with S3 bucket, copying missing files, updating modified files, and deleting removed files. s3 cp the command copies a single file or object from source to destination, overwriting if necessary. s3 sync is for synchronization, s3 cp is for a one-time copy.
Summary:
In this blog, we have learned how to store backups of files and folders in AWS s3 using aws s3 sync CLI.


